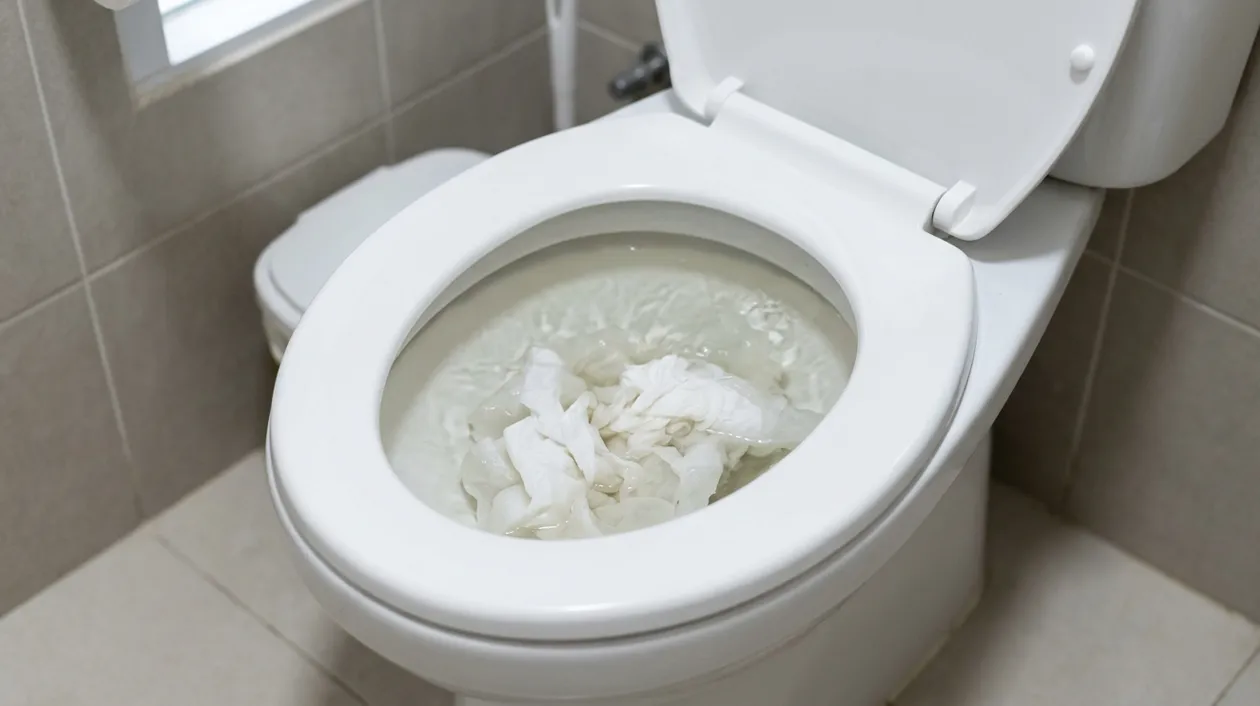
It’s a typical morning. You’re rushing to get ready for work, and just as you’re about to dash out the door, you’re stopped in your tracks by a badly blocked toilet.
Panic sets in, how are you going to fix this mess quickly?
Don’t worry! We’re here to walk you through how to unblock a badly blocked toilet, step by step, so you can get on with your day without any more unpleasant surprises.
What’s the Quickest Way to Unblock a Toilet?
When it comes to tackling a stubbornly blocked toilet, your best bet is a trusty plunger—preferably one with a flange for an extra snug fit. Start by making sure there’s enough water in the bowl to cover the rubber part of the plunger (add some if needed!). Give it a good, firm plunge, aiming to create strong suction and pressure—that’s what dislodges the pesky blockage.
Want to up the odds? Pour a generous squirt of dish soap and a splash of hot (not boiling) water into the bowl and let it sit for a few minutes before plunging. The soap helps loosen things up, giving you a better shot at clearing the clog without calling in the cavalry.
If you’re hoping for a lightning-fast fix, the hot water and dish soap combo is your secret weapon. Pour a generous amount of dish soap into the bowl first, then follow it up with hot water from the tap (not boiling, or you might crack the porcelain). The heat and soap work together to break down fats and organic matter, softening up the stubborn clog. Let that mixture sit for a few minutes to do its thing—sometimes, this alone is enough to shift a minor blockage.
However, if you’re facing a tougher or more complex clog, be prepared for a bit more time and elbow grease. The plunger might need a few good rounds, and in rare cases, you may have to reach for a toilet auger or snake. But for most everyday blockages, this combo of good old-fashioned plunging and the dish soap trick will have you back in business in no time.
Why Acting Fast Matters
So, why not just close the door and pretend it’s not your problem? Trust us—waiting it out can turn a minor hassle into a major disaster. When a toilet is blocked, leaving it unattended can lead to nasty overflows, serious water damage, and even bigger plumbing headaches (think calling in the professionals and footing a hefty bill).
Acting quickly helps you steer clear of these messes and keeps your bathroom—and your day—running smoothly.
What Not to Flush—The Usual Suspects
If you want to keep your pipes free and clear, it’s all about being picky with what goes down the loo. Besides the obvious (yep, just toilet paper and, well, “nature’s call”), there are a few repeat offenders you’ll want to steer clear of:
- Paper towels: They might look innocent, but they don’t break down like toilet paper and can cause major roadblocks.
- Wet wipes (even those labelled “flushable”): Trust us, they’re the villains in most clog stories.
- Cotton products: Things like cotton balls, swabs, and pads are notorious for snagging and collecting in the pipes.
- Feminine hygiene products: Tampons and pads expand and can quickly create a stubborn jam.
Treat your toilet kindly and only give it what it’s designed to handle—your pipes will thank you, and you’ll spend less time reaching for the plunger!
Toilet Water Rising and Slowly Draining—What’s Going On?
Ever noticed your toilet water creeping up towards the rim, only to finally (and reluctantly) swirl away at a snail’s pace—even if you’re sure there isn’t a total clog? You’re not imagining things, and it’s not just your morning luck.
This sluggish behaviour usually points to two common culprits:
- A Partial Blockage: Sometimes, it’s not a full-on clog, but a sneaky partial blockage hiding further down the pipes. This slows the flow, causing water to back up before it eventually slips past the obstruction.
- Ventilation Issues: Your toilet relies on proper ventilation to flush and drain efficiently. If the vent pipe (often running up through your roof) is blocked by debris, leaves, or the occasional curious critter, it can create an airlock—making the water rise and linger before draining.
What Can You Do?
Try pouring hot (but not boiling) water and some dishwashing detergent into the bowl. Let it sit—sometimes this combo loosens whatever’s causing the slowdown. If things still aren’t moving smoothly, it’s worth checking the vent pipe for obstructions. Outdoor work isn’t always the most fun, but trust us, it beats a flooded bathroom any day.
Now, before you grab your plunger or panic-schedule that emergency plumber, let’s tackle the situation step by step.
Why Does My Toilet Keep Getting Blocked?
If it feels like your toilet has a vendetta against you—constantly clogging up, no matter how careful you are—don’t worry, you’re not alone. Recurring blockages are a common frustration, but they’re usually down to a few big culprits:
- Flushing Trouble-Makers: Even if the packaging says “flushable,” items like wipes, cotton buds, or sanitary products don’t break down like toilet paper. They get snagged in the pipes, building up trouble over time.
- Toilet Paper Overload: Sure, we all want to stay comfortable, but using too much toilet paper in one go can outmatch your toilet’s flushing power. A couple of extra squares can mean the difference between a clean flush and a stubborn blockage.
- Older Plumbing Woes: If you live in an older home with vintage pipes, buildup from years (or decades!) of use can narrow the passage, making your toilet more prone to clogs.
- Hidden Plumbing Gremlins: Sometimes, the issue lurks out of sight—tree roots infiltrating outdoor pipes, or a blocked drain further down the line. These require the pros (like your friendly neighbourhood plumber) to track down and fix for good.
How to Keep Blockages at Bay:
- Only flush the “three Ps”: pee, poo, and (toilet) paper.
- Moderate your TP use—less is truly more.
- Make a habit of regular cleaning to keep things moving smoothly.
If you’re still battling frequent clogs after these tweaks, it could be time to call in a licensed plumber for a closer look—better to get to the root of the problem than keep plunging your mornings away!
Will a Toilet Fix Itself If You Wait?
You might be tempted to cross your fingers and hope your toilet sorts itself out while you get on with your day. Unfortunately, this is wishful thinking. Unless you’re dealing with a tiny clog (think: the kind that’s gone after one extra flush), most blockages won’t magically disappear on their own.
Letting it sit can make matters worse—leading to overflows, smelly surprises, and even bigger plumbing issues that demand professional (and pricey) help. Instead, it’s best to roll up your sleeves and take action right away to nip that problem in the bud.
Step 1: Stop the Water
First things first, let’s prevent a bigger mess. Reach behind the toilet and turn off the water supply valve. This will stop more water from filling the bowl while you work on unblocking it.
Got a Toilet Full of… Everything?
If you’re staring down a toilet bowl that’s full to the brim (yep, with all the fun stuff), don’t panic. There’s a simple hack you can try before resorting to harsher measures.
Grab your bottle of dish soap—the regular kind you’d use on your plates. Squeeze a generous amount right into the toilet bowl. The soap helps break down the mess and makes things more slippery, giving you a better shot at getting things moving.
Next, heat up a bucket of water, but don’t use boiling water (you don’t want to crack the porcelain). Pour the hot water into the toilet from waist height. The force can help disturb the blockage, and the warmth works with the soap to loosen things up.
Wait for about 10-15 minutes to let the combo work its magic. Sometimes, gravity and patience do the heavy lifting. Afterwards, try flushing. With a bit of luck (and some science), your clog should clear—or at least become much easier to tackle with the plunger.
How to Unclog a Toilet Full of Poop and Water
Facing a toilet that’s more “Mount Vesuvius” than “peaceful pond”? Don’t fret. Here’s a quick fix you can try at home—no fancy gadgets required.
Start by grabbing your trusty dish soap (yep, the same stuff that tackles your greasy pans). Squirt a generous amount into the toilet bowl. The soap will help break down the mess and lubricate the pipes, improving your chances of dislodging the blockage.
Now, heat up a bucket of water—hot, but not boiling (you don’t want to risk cracking the porcelain). Pour the water into the bowl from waist height. This extra force helps push things along while the heat works with the soap to loosen the clog.
Give it ten to fifteen minutes for the duo to do their thing. If all goes well, you’ll see the water level drop. Finish up with a quick flush—fingers crossed, you’ll watch everything disappear down the pipes! If not, you’re set up for an easier time with a plunger or the next unclogging strategy.
No Plunger? No Problem (Even If the Water’s High)
If you’re facing a blocked toilet and the water’s perilously close to the rim—don’t panic. Here’s how to tackle the clog, plunger-free:
- Patience Pays Off: First, play the waiting game. Give the water time to slowly drain down to a safer level on its own. This prevents an accidental flood and gives you space to work.
- Dish Soap & Hot Water Magic: Once the water’s settled, grab some dish soap (the regular kitchen kind will do). Squeeze a generous amount into the bowl. Then, carefully add a bucket of hot (not boiling!) water. The combination helps lubricate and break down the clog.
- Let It Work: Leave the solution to do its thing for about 20 minutes. Often, this gentle approach loosens stubborn blockages.
- Test with a Flush: When time’s up, try a gentle flush. If the water level is back to normal, you’re golden! If it’s still stuck, don’t be shy—repeat the soap and hot water process.
- MacGyver Move (If Needed): Still stuck? You can straighten out a wire coat hanger, cover the end with a bit of cloth for protection, and gently wiggle it down the drain to nudge any lingering blockage.
And there you have it: a plunger-less plan that keeps your bathroom drama to a minimum.
Looking for More Ways to Outsmart a Stubborn Clog? Try These:
- Baking Soda & Vinegar Fizz: If you’re fresh out of dish soap or just want to double your odds, grab some baking soda and white vinegar (household staples to the rescue!). Pour about a cup of baking soda into the bowl, followed by one to two cups of vinegar. Let it fizz and bubble for several minutes—think of it as a science fair in your toilet. After the show, follow up with hot water and let everything sit before attempting a flush.
- Epsom Salt or a Bath Bomb: Got a random bath bomb or a stash of Epsom salt? Toss a generous amount into the bowl. The rapid fizzing can help break down the blockage. Wait for the action to settle, then try flushing.
- Old School Wire Hanger: If things are still looking grim, revisit the old coat hanger trick—just remember to be gentle and protect your porcelain with a bit of cloth on the end.
With these tricks up your sleeve, you’ve got backup plans in case the first plunger-free method doesn’t do the trick. Sometimes, it takes a little creativity (and maybe a bit of chemistry) to save the day—no plumber required.
The Cling Film Trick: Unblocking with a Little DIY Ingenuity
Stuck in a bind and out of plungers? There’s a clever hack floating around TikTok and DIY forums: unblocking your toilet with nothing but regular kitchen cling film (yep, the same stuff you wrap your sandwiches with). Here’s how to give it a go:
- First, grab a few sheets of cling film and dry off the rim of your toilet bowl with a towel. A dry surface helps the plastic stick better.
- Layer the cling film over the entire seat and bowl, stretching it taut and pressing firmly down to make sure it forms a tight, airtight seal all around. Gently close the lid over the film for extra security.
- Now, flush the toilet just once. You’ll notice the cling film starts to puff up from the air and water pressure building underneath.
- Here’s the fun part: using both hands, gently press down on the ballooned cling film (think of it as squashing a giant water pillow). The added pressure often helps to move the blockage down through the pipes.
- If needed, you can repeat the process, always keeping an eye out to make sure things don’t start to overflow.
With a little patience (and a steady hand), this makeshift fix can sometimes save the day—no plumbing tools required!
What to Do if the Bowl Is Full
Before you start plunging, you might notice that the toilet bowl is almost brimming with water (or worse). If that’s the case, you’ll want to remove some of the excess liquid to avoid an overflow situation.
Grab an old cup or small container—think plastic takeout cup, or even a large ladle if you have one handy. Use it to carefully scoop the water out of the bowl and transfer it into a bucket or bin. Work slowly to avoid splashing.
Once you’ve tackled most of the standing water, take an old sponge or rag to soak up anything that’s left at the bottom of the bowl. Wring the liquid into your bucket until things are as dry as possible. This will make the next steps a whole lot neater.
Step 2: Get Your Tools Ready
You’ll need a few basic tools:
- A plunger (make sure it has a flange for better suction)
- Rubber gloves
- A bucket or a plastic bin just in case
How to Use the Wet/Dry Vacuum Method (Without Regret)
If your trusty plunger has let you down and the toilet’s still slow to drain, it’s time to unleash a secret weapon: the wet/dry vacuum. Yes, that shop vac out in the garage can save the day—if you use it right. Here’s how to get the job done (and stay on the good side of both your nerves and your circuit breaker).
Step-by-Step: Wet/Dry Vacuum Toilet Rescue
- Prep Your Equipment: Make sure your wet/dry vacuum is in wet mode, and grab a clean, dry hose attachment. If it’s been sucking up sawdust, give it a quick clean first.
- Create a Tight Seal: Place the hose directly over the toilet drain. For best results, press down and use a towel wrapped around the hose base to keep air from sneaking in. You may need to hold it in place—think of it as a gentle wrestling match.
- Fire It Up: Turn on the vacuum and let it do its thing. The suction should start drawing out water and (hopefully) the clog. Keep an eye on the water level—it should drop as the blockage clears.
- Repeat as Needed: Stubborn clog? Don’t give up. Remove, empty if needed, and give it another go. Sometimes it takes a couple of rounds for the magic to happen.
Important Safety Tips for Wet/Dry Vacuum Use
Before you go MacGyvering your toilet with a wet/dry vacuum (yes, it can be done!), let’s talk safety. These machines pack a punch, so a little prep goes a long way.
- Suit Up: Always put on rubber gloves before starting, and if you have safety goggles handy, pop those on too. Toilets are not known for their cleanliness.
- Mind the Fill Line: Wet/dry vacuums aren’t bottomless pits—keep an eye on how much water and gunk you’re sucking up. Empty the tank when needed to keep the suction going strong and prevent any messy overflow.
- Proper Waste Disposal: Whatever comes out of your toilet needs to go somewhere safe. Empty the vacuum’s contents into a suitable drain or directly into a bag for disposal according to your local council’s guidelines—nobody wants mystery sludge in the wrong place.
- Keep It Dry Where It Counts: Power cords and puddles do not mix. Make sure connections and outlets stay dry to avoid any unpleasant surprises (like an electrifying morning you didn’t ask for).
Take a breath, double-check these steps, and you’ll be ready to tackle that clog with confidence.
Precautions When Using Hot Water
A word of warning before you reach for the kettle: not all heat is a friend to your porcelain throne. If you’re thinking about the hot water trick, keep these points in mind:
- Temperature matters: Use hot tap water—not boiling. Boiling water can crack the toilet bowl and turn a small problem into a plumbing catastrophe.
- Safety first: Always wear rubber gloves when handling hot water and take care to avoid splashes. Trust us, you don’t want burns to add to your morning drama.
- Overflow prevention: Double-check that the water supply is turned off before pouring anything into the bowl. This saves you from a flooded bathroom floor.
- Know when to stop: If your first few attempts with hot water don’t clear the clog, don’t be a hero. It’s time to try another method or call in a professional (think Roto-Rooter, not MacGyver).
Now that you’re briefed and ready, let’s move on to the business end of unblocking.
Hot Water to the Rescue
If you’re looking for a method that doesn’t require any elbow-deep plunging just yet, the hot water technique might do the trick—especially for stubborn but not impossible clogs.
How Does the Hot Water Method Work?
Warm (not boiling!) water helps by softening whatever is clogging up the pipes. Pair that with a squirt of dishwashing liquid and the combination can break down and loosen things so gravity and a good flush can send it all on its merry way.
Step-by-Step: Hot Water Method
- Heat Some Water: Boil a kettle or heat about two to three litres of water in a pot. Let it cool a touch—you don’t want scalding water, just hot enough to help, but not so hot that it risks damaging your toilet bowl.
- Prep the Toilet: Make sure the water supply is still off from Step 1. If the bowl is close to overflowing, scoop out some excess water using a plastic container or small bucket. Rubber gloves are your friend here.
- Add Detergent: Pour in about half a cup of liquid dish soap. This helps lubricate the pipes and works with hot water to break down greasy or sticky blockages.
What’s really happening here? When you pump the plunger, you’re creating both suction and pressure, forcing water back and forth through the clog. This sudden movement helps break up whatever is causing the blockage, allowing water to flow through the pipes and—hopefully—flush everything away. It’s simple physics, but it works wonders.
- Pour Carefully: Gently pour the hot water into the bowl from about waist height. This helps the hot water hit the right spot with enough oomph (and less splashing).
- Wait a Bit: Let the mixture sit for 10-15 minutes. With luck, you’ll see the water level drop as the clog loosens.
- Test Your Luck: If the water drains, try giving the toilet a gentle flush. If not, repeat the process—but don’t force more water in if the bowl is already full.
A Few Quick Tips
- Don’t use boiling water (trust us, you want your toilet intact).
- Keep those gloves on—no one ever regretted that.
- If after two rounds nothing happens, it’s time for the plunger (or to call in the pros).
This method is a simple first step—sometimes all it takes to shift that stubborn blockage without breaking a sweat.
Baking Soda and Vinegar: The DIY Unblocker
If you’d rather not get (too) hands-on, or you don’t have a plunger nearby, head to your kitchen for a simple but powerful hack: baking soda and vinegar. Unlike those mysterious “miracle” toilet tablets your aunt swears by, this combo uses everyday pantry staples—and a little harmless chemistry—to break down the blockage for you.
Here’s how to work your kitchen magic:
- Pour about half a cup of baking soda directly into the toilet bowl. No need to be shy—make sure it lands as close to the blockage as possible.
- Next, warm up 2-3 cups of vinegar (think: coffee-mug hot, not volcano hot) either in the microwave or on the stove.
- Carefully pour the vinegar into the bowl where the baking soda is waiting.
- Quickly close the lid. The foaming action will bubble and fizz, working to dissolve organic nasties lurking in your pipes. (Consider it the closest your bathroom will get to a science fair.)
- Let the mixture do its thing for about 30 minutes. Grab a coffee, do a little victory dance, and resist the urge to keep checking.
- After waiting, try flushing. If the water swirls away like nothing ever happened—job done! Still slow to drain? You can repeat the process, or move on to sturdier methods.
A few quick cautions:
- If you have a septic tank or live in a home with old-school plumbing, go gentle—too much fizz can sometimes overwhelm sensitive systems.
- Skip this trick if you already poured other chemical cleaners down the pipe; some chemicals don’t play nicely together.
- And please, don’t mix vinegar with bleach unless you want to recreate a 1980s sci-fi lab disaster.
With this trusty home chemistry set, you might just save the day—and your dignity—without breaking a sweat (or the bank).
Step 3: Plunge Away
Now, let’s get to the action. Fit the plunger over the toilet’s drain hole and make sure you’ve got a good seal. With a firm grip, push down and pull up vigorously. You’re not just pushing; you’re trying to create suction to dislodge the blockage.
Keep at it for a few minutes. This is your go-to method for how to unblock a badly blocked toilet fast.
Getting the most out of your plunger
Three things separate a plunge that works from one that just splashes: a flange plunger rather than a flat sink one, a cup filled with water rather than air, and a hard pull rather than a hard push. We’ve broken all of it down in our full guide to using a plunger properly.
Step 4: Check the Flow
After several plunges, lift the plunger quickly to break the air seal. The water should rush down the drain. If it doesn’t, give it a few more vigorous plunges. Patience is key here!
Step 5: The Snake
If plunging doesn’t work, it’s time to use a toilet auger or a snake. Carefully feed the snake down the toilet pipe, twisting it as you push to help it bend through the curves of the pipe.
When you feel resistance, you’ve likely found the clog. Twist the snake to break through the blockage, then slowly pull it out.
If you haven’t wrangled a snake before, here’s a quick breakdown:
- Prep the auger: Start by extending the auger’s shaft to its full length—this gives you enough reach to get at stubborn clogs lurking deep in the drain. Make sure the curved end is angled downward as you slide it into the bowl.
- Guide it in: Feed the snake gently into the toilet, keeping steady pressure so it follows the twists and turns of the pipe (no need to force it).
- Tackle the blockage: When you hit that telltale resistance, crank the handle clockwise. This helps the snake’s tip pierce or snag the obstruction.
- Break it up: Keep twisting and applying gentle pressure until you feel the blockage give way.
- Retrieve with care: Slowly back the auger out of the toilet, keeping an eye out for anything it might have pulled with it—just be gentle so you don’t scratch the porcelain.
- Finish strong: Give the toilet a flush to make sure the water flows freely. If the clog persists, a second try or an alternative approach may be needed.
If the blockage still refuses to budge or you’re unsure about going further, don’t sweat it—sometimes it’s best to call in a professional plumber.
Commercial Enzyme Cleaner Options
Still feeling stumped? You might be wondering if there’s an easier, hands-off method. Enter commercial enzyme cleaners—nature’s little powerhouses that tackle organic waste. These products are designed to break down whatever’s lurking in your pipes using natural bacteria and enzymes, making them a favourite among DIYers and pros alike.
You’ll find several types available, including:
- Liquid Enzyme Cleaners: Easy to pour into the toilet and excellent for ongoing maintenance.
- Gel Formulas: Cling to problem areas a bit longer to help break down tough blockages.
- Powdered Enzyme Packets: Just dissolve in water before use, ideal for monthly preventative care.
Popular options include Green Gobbler, Zep, and Bio-Clean, all of which are widely available at places like Bunnings, Mitre 10, hardware stores, and online.
Always read the instructions on the packaging and make sure the cleaner is safe for toilets and septic systems before you get started. Give it time to work overnight for the best results.
Why Make Enzyme Cleaners a Habit?
Regular use of enzyme cleaners isn’t just for emergencies—it’s also a smart move for ongoing maintenance. By working these cleaners into your cleaning routine, you help prevent future blockages before they begin. Enzyme cleaners keep your toilet and plumbing system free from organic buildup, which means fewer nasty surprises and less chance of costly repairs down the track.
Whether you stick with commercial options or try homemade solutions, enzyme cleaners offer a safe, natural, and eco-friendly way to keep your toilet running smoothly. With a bit of regular effort, you’ll maintain a clean, efficient system and minimise the risk of backups—leaving you with one less thing to worry about.
Simple Habits for Smooth-Running Plumbing
- Keep it Clean: Make a habit of cleaning your toilet bowl, rim, and outer surfaces regularly. A little attention goes a long way to stop grime and debris from building up where you least want it.
- Flush Wisely: Only flush toilet paper and what’s meant to be flushed—no paper towels, wet wipes, cotton balls, or other “maybe just this once” items. They’re notorious for causing blockages.
- Watch for Warning Signs: If your toilet starts draining slowly, or you hear odd gurgling sounds, don’t ignore them. These are early alerts that a blockage might be forming.
- Don’t Hesitate to Call in the Pros: If things go sideways and your DIY tricks aren’t working, a professional plumber can save you time, stress, and potentially major toilet repairs later.
Building these small habits into your routine, alongside the regular use of enzyme cleaners, is the best way to keep your bathroom blissfully boring—no drama, no unexpected mess, just smooth sailing every time you flush.
Step 6: Test and Clean
Turn the water supply back on and flush the toilet to see if the water drains normally. If it does, congratulations, you’ve mastered how to unblock a badly blocked toilet pipe!
If it’s still slow, you might need to repeat the snaking process.